
| Linux-Mandrake: |
| User Guide and |
| Reference Manual |
MandrakeSoft
January 2000 http://www.linux-mandrake.com
/proc filesystemWell, you must tell, an implementation of an exotic dance for Linux. What does this mean, indeed? No, it has nothing to see with the Brasilian dance, It is a server for SMB clients (the Server Message Block) or its successor CIFS (Common Internet File System).
tar extension for the clients, in order to create remote
backups.
For more information about all that, please consult the website
http://samba.org/samba/.
Such as Linux, this software is an Open Source project in the scope of the GPL and the GNU project, entirely written in C, with freedom and gratis. It is freely distributable, you are even encouraged to do so.
This document will help you installing a SMB server.
If you already use Samba, run /etc/rc.d/init.d/smb
stop. On the installation CDROM you will find the package named
samba-2.0.6-1mdk.i586.rpm which you can install, as
root, with command rpm -Uv h samba-*mdk.i586.rpm.
The command rpm -ql samba|less allows you then to view the
list of all files provided with the package, and their location. This
allows you to find files of the doc section, etc.
/etc/smb.confThis is the text file allowing you to configure the Samba server.
It is made of different sections which titles are placed into brackets
[ ]. Every line beginning with a ';' or a '#' is
ignored at Samba startup. This is often used to add explanation
comments on the different sections. Thanks to that, it will be easier
later when reading again the file.
During the package install, a /etc/smb.conf file has been copied to
your computer. We will use this file as a template.
There are three special sections: [global],
[printers], and [homes].
[global] sectionHere are introduced the parameters applied to the server itself, in its whole, or that will be used as default parameters for some sections.
[global]
netbios name =          Zeus
netbios aliases =       creation
# without these two entries, the first part of the
# DNS name will be used instead.
workgroup =             DESIGN
# Samba can only belong to one work group ar a
# time
server string =         File server [%v]
# this indicates the name and the version number to
# print
deadtime =              15
# maximal inactivity time
auto services =         john
# this service, although present in the exploration
# list, is not available until john connects to the
# server
security = user
This latter parameter may take one of four values: share,
user, server or domain.
share mode: In this mode, the client sends a password
while asking for a connection, but no username is required. This mode
is the default security mode for files or printers under
Windows 95. It may be changed, under Windows 95 in the
Network section of the Configuration Panel,
under Access Control.
user mode: This security mode is recommended. You are
here asked for a valid username and its associated password.
server mode: This mode is derived from user
mode. The Samba server sends a session opening request to the
passwords server.
password server = NT_passerv
# where NT_passerv is the name of the NT passwords
# server. Various servers may be listed.
domain mode: This mode is hardly the same as the
previous one.For these last three modes, the user has to be "created" on the Samba server.
hosts allow = john.design.org 192.168.1.45 EXCEPT 192.168.2.
With this line, all users from 192.168.2. network will be rejected.
hosts deny = 192.168.2
This line has the same effect as the previous EXCEPT
statement.
guest account = pcguest
# If you wish to add a guest user; to be
# added in /etc/passwd
First of all, create the shared directory with the command
mkdir /home/shared and set owners and permissions with
chmod and chown. For example, chmod
0777 gives all rights towards this folder on the Unix side.
However, Samba has to allow this too.
[share]
  comment = share access granted to everyone
  path = /home/shared
  browsable = yes
  writable = yes
  create mask = 0750
# means that the creator of the file has rwx
# rights on it, the group r-x and others r--
  directory mask = 0750
# same meaning but for directories
  mangled names = yes
# converts names in a DOS/Windows manner, with
# eight characters for the name and three for the
# extension.
  preserve case = no
# do not take case into account.
Another example of sharing
First of all, be sure to load the ppa module with command
modprobe ppa.o.
[zip]
comment = automatically mount/unmount the zip drive
  browseable = yes
  path = /mnt/zip
  root preexec = /bin/mount /dev/sda4 /mnt/zip
  root postexec = /bin/unmount /mnt/zip
[homes] sectionIt makes the home directory of each user available from a Windows box with their username and password.
This is a special sharing type.
[homes]
  comment = Home directories
  browseable = no
  writable = yes
  path = /export/homes/%U
  valid users = %S
[printers] sectionThis is another special sharing type.
[printers]
   comment = shared printers
   path = /var/spool/samba
   load printers = yes # load all available printers
   browseable = no
   printable = yes
   public = no
   writable = no
   create mode = 0700
You may also print from Linux on a printer connected to a PC
running Windows. To do so, use printtool and setup the
printer. This will create an entry into /etc/printcap. Be sure
that the printer is set shareable under Windows.
There are a lot of other parameters, for more information, run
man smb.conf.
Before launching smb and nmb daemons, launch
testparm. This command will read /etc/smb.conf and
print which entries will be taken into account.
Just type /etc/rc.d/init.d/smb start. The following messages
should be printed:
Starting SMB services:                                   [OK]
Starting NMB services:                                   [OK]
To check that the daemon is running, run ps aux | grep smbd or
/etc/rc.d/init.d/smb status
This is a utility close to ftp that enables you to connect to a
PC running Windows. To know the list of shares accessible on
PC win through SMB, launch smbclient -L
win -N. Launch smbclient
//win/work to connect to the share work on the PC called
win. You may also use smbclient winwork.
To create a tar archive of the work share, launch
smbclient //win/work -Tc work.tar. To print a file
letter.txt to the printer my_printer connected to the
PC win, type
cat letter.txt | smbclient //win/printer_name my_password \
  -N -c "put - john"
For more information, run man smbclient.
For you being able to mount/unmount some directories from
Windows on your Linux box, your kernel needs to support
the smbfs filesystem (which is the case for the
Linux-Mandrake distribution). Then you can use the programs
smbmount and/or smbumount. For example:
smbmount "winwork" -c 'mount /mnt -u 123 -g 456'. Which
will locally mount the share work with a local UID of 123
and a local GID of 456.
Allows to create tar archives remotely. Read the manual page for
more information on its numerous options.
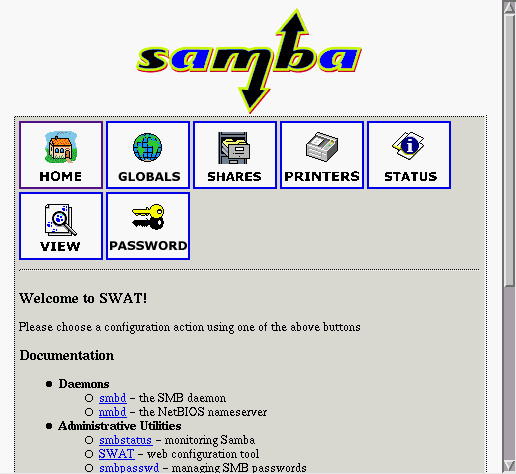
SWAT is a configuration utility included with the Samba
package. To make it
available you must first comment out (delete the # at the
beginning of the line) the line:
swat stream tcp nowait.400 root /usr/sbin/swat swat
in /etc/inet.conf file and then
restart inet services through /etc/rc.d/init.d/inet
restart.
From your favorite web browser (preferably a graphical one), type in the
following URL: http://127.0.0.1:901. An authentication window
should appear (figure 46.1) where you will be asked
for a login name and password. The root login should be secure
enough.
Here you are, in a graphical interface to edit the parameters of
smb.conf. You should be able to use this interface
without trouble following the explanations given here and consulting
the manual pages for more specific configurations.
smb.conf sample file:
[global]
  workgroup = MyWorkGroup
  server string = (Samba %v)
  #server string = Samba Server
  browseable = yes
  printing = bsd
  printcap name = /etc/printcap
  load printers = yes
  log file = /var/log/samba/log.%m
  max log size = 100
  lock directory = /var/lock/samba
  locking = no
  strict locking = no
  share modes = yes
  security = user
  null passwords = yes
  socket options = TCP_NODELAY
  # Allows the Samba server to become a domain controller
  #os level = 33
  #domain master = yes
  # Facilitates the long names recognition
  preserve case = no
  short preserve case = no
  character set = iso8859-1
[homes]
  comment = Home Directories
  preexec = /bin/sh -c 'echo /usr/bin/smbclient -M %m -I %I'&
  browseable = yes
  readonfiltered= no
  writable = yes
  create mode = 0750
  public = yes
["public"]
  comment = "Public"
  path = /public/
  browseable = yes
  hide dot files = yes
  readonfiltered= no
  public = yes
  pritable = yes
  #create mode = 0775
  printable = no
["printers"]
  comment = All Printers
  #path = /var/spool/samba
  path = /var/spool/lpd/lp
  browseable = yes
  # Set public = yes to allow user 'guest account' to print
  guest ok = yes
  writable = yes
  printable = yes
If you need more information, you are invited to consult the Samba documentation.
/proc filesystem